Whether you're using a high-end mirrorless camera or just an iPhone, the goal is to move beyond the obvious. We're talking about finding the hidden gaps in the tourists, using the sculpture's curvature to create surreal perspectives, and capturing the city's energy without a hundred strangers in your background.
The Secret to the Perfect Reflection
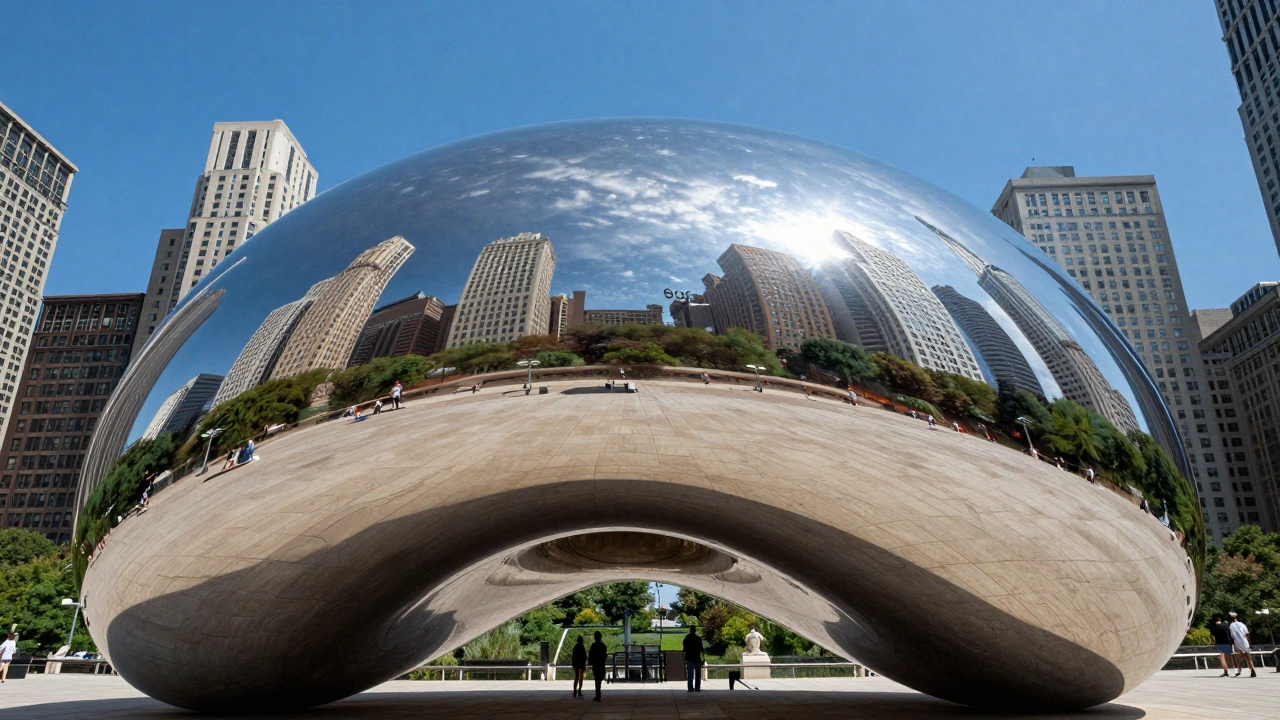
The most striking part of the sculpture is the omphalos-the concave underside where you can walk beneath the structure. This is where the physics of the mirror get weird. Because the surface curves inward, it creates a fish-eye effect that compresses the Chicago skyline into a small, circular frame.
To get a crisp shot here, don't look straight up. Instead, tilt your camera slightly and find the point where the skyline meets the edge of the steel. If you're shooting with a smartphone, tap the brightest part of the reflection on your screen to lock the exposure. This prevents the bright Chicago sky from 'blowing out' and turning into a white blob, keeping the details of the buildings sharp. Try crouching low; the lower your perspective, the more the curve of the Bean wraps around your subject, creating a cocoon-like feel in the image.
Mastering the Best Angles
Most people stick to the center, but the real gold is at the edges. If you move toward the perimeter of the plaza, you can capture the transition between the organic shape of the sculpture and the rigid lines of the surrounding architecture.
One of the best angles is the "Side-Sling." Stand at the far east end of the sculpture. From here, you can capture the Bean as a sleek, silver streak that leads the viewer's eye toward the Michigan Avenue corridor. Another winning spot is the "Low-Angle Glide." Get your camera as close to the granite pavement as possible. This emphasizes the scale of the sculpture and allows you to catch the reflection of the clouds and the sky in the bottom curve, making the Bean look like it's actually floating on a mirror of water.
Timing Your Visit for Better Light
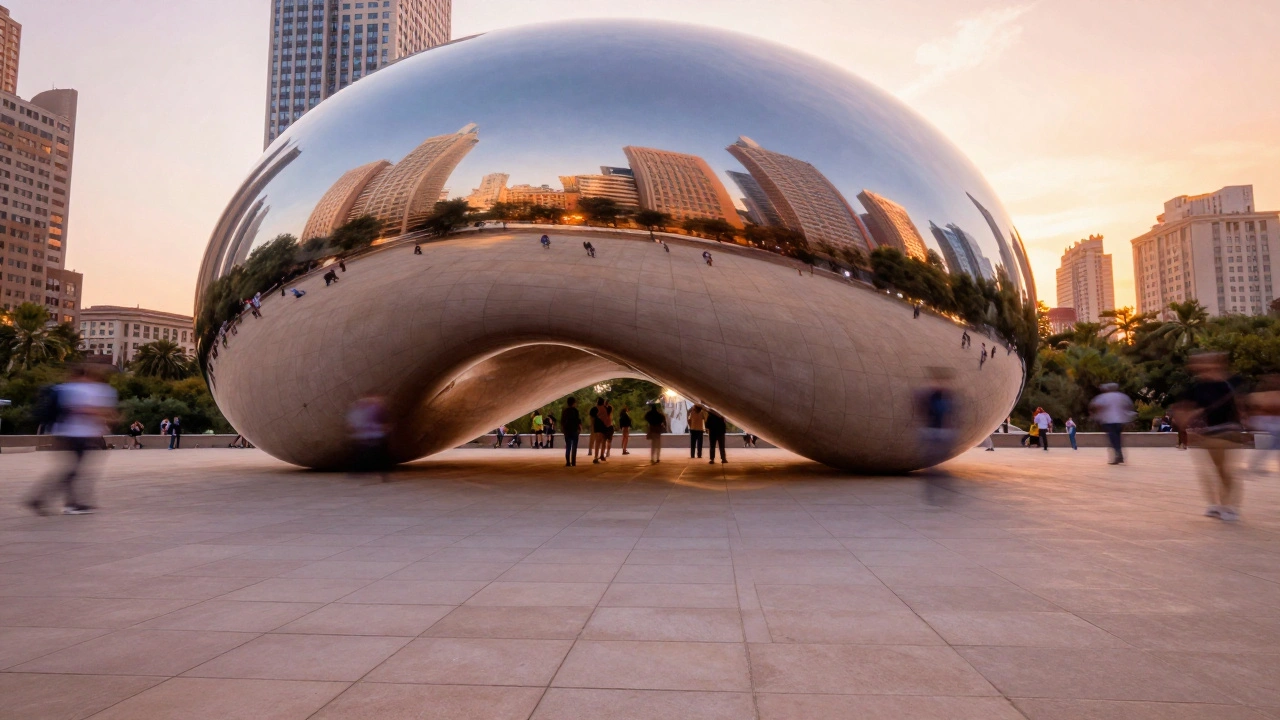
Light is everything when you're dealing with a giant mirror. Midday sun is your enemy; it creates harsh, blinding highlights and deep, ugly shadows. The best time to visit is during the "Golden Hour"-the hour after sunrise or before sunset.
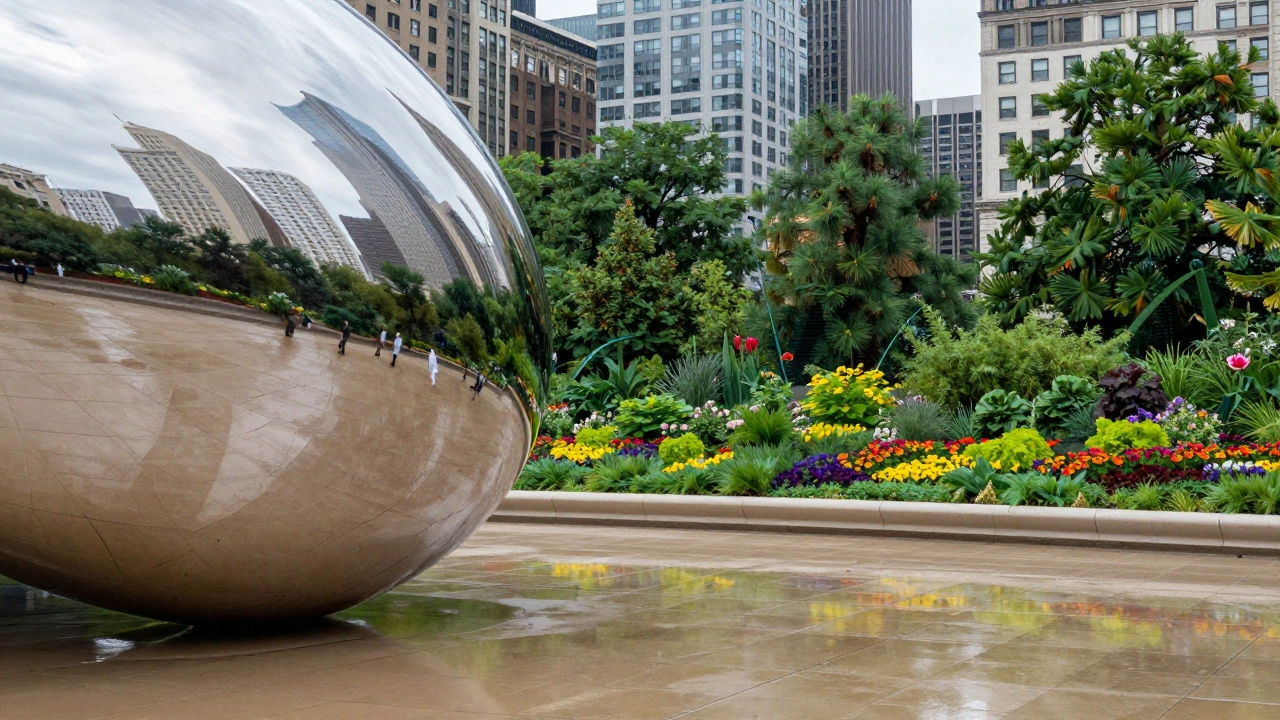
During these times, the stainless steel catches the orange and pink hues of the sky, giving the sculpture a warm, ethereal glow. If you're brave enough to arrive at 6:00 AM, you'll find the park nearly empty. This is the only time you can get a clean shot of the surface without a dozen other people's reflections appearing in your frame. Alternatively, try visiting right after a rainstorm. The wet pavement of Millennium Park acts as a second mirror, doubling the visual impact of the skyline and the sculpture.
Dealing with the Crowd Chaos
Let's be real: The Bean is always crowded. You can't control the people, but you can control how you frame them. Instead of fighting the crowd, use them. A long-exposure shot (using a tripod or a steady hand with an app like Slow Shutter Cam) can blur the moving people into a ghostly mist, leaving the static, shimmering sculpture as the only sharp element in the photo.
If you prefer a clean shot, look for the "Negative Space" gaps. There are often small pockets of space near the edges where the crowd thins out. Use a tighter crop or a zoom lens to isolate your subject from the surrounding noise. Remember, the Bean is a 360-degree experience. If the north side is packed, walk to the south side; the reflection changes entirely, and the crowd density often shifts.
Comparing Equipment for the Best Results
You don't need a $3,000 rig to get a great photo, but different tools offer different advantages. A wide-angle lens is great for capturing the sheer scale of the sculpture and the park, while a telephoto lens allows you to compress the reflection of the buildings, making the skyline look more imposing.
Here is a quick breakdown of how different gear handles the environment:
| Gear Type | Best For | The Trade-off | Pro Tip |
|---|---|---|---|
| Smartphone (Wide) | Quick selfies & panoramas | Less dynamic range in highlights | Use HDR mode to balance sky and steel |
| Mirrorless (Wide Angle) | Architectural scale & vistas | Can distort edges of the sculpture | Use a polarizing filter to cut glare |
| Mirrorless (Telephoto) | Compressed skyline reflections | Requires more space to step back | Shoot from the park perimeter |
| Tripod + Long Exposure | Artistic, crowd-blurring shots | Slower workflow, more gear to carry | Use a 1-2 second shutter speed |
Common Pitfalls to Avoid
The biggest mistake people make is ignoring the "Reflection Loop." If you stand too close to the center, you'll often see your own reflection-and the reflection of the person behind you-right in the middle of your shot. Step back three feet, and the curvature of the steel will naturally push the 'unwanted' reflections out of the frame.
Another error is forgetting the background. While the Bean is the star, the background of your photo is often a sea of tourists in bright t-shirts. Use the "Rule of Thirds": place the sculpture in the left or right third of the frame, and use the surrounding greenery of the park to mask the crowd. Also, watch out for the "Silver Flare." If the sun is directly behind the sculpture, it can create a lens flare that washes out your colors. Use a lens hood or simply use your hand to shade the top of the lens to keep the contrast high.
Expanding Your Park Tour
Once you've nailed the Bean, don't just head back to the hotel. The area around Cloud Gate is a goldmine for other visual stories. Just a short walk away is the Crown Fountain, where the towering LED faces spout water. These are perfect for capturing candid reactions and high-speed water splashes. If you're looking for a contrast to the silver steel, head toward the Lurie Garden. The organic textures of the perennials and the geometric lines of the walkways provide a great visual counterpoint to the futuristic look of the Bean. By mixing these different textures-steel, water, and flora-you create a complete visual narrative of Chicago's urban design. The absolute best time is shortly after sunrise (6:00 AM to 8:00 AM). Not only is the light soft and golden, which prevents harsh reflections on the steel, but the park is significantly less crowded, allowing you to get shots without other tourists in the reflection. No. Modern smartphones are excellent for this. Because the sculpture is essentially a giant mirror, the high contrast can be tricky, but using the 'HDR' setting on a phone helps balance the bright sky and the darker reflections. Focus more on your angle and timing than your gear. Walk directly under the sculpture into the concave section (the omphalos). Look up and slightly offset from the center. This creates a distorted, circular reflection of the surrounding skyscrapers that looks like a natural fish-eye lens. There are three ways: visit at dawn, use a long-exposure setting to blur people into a mist, or use a telephoto lens from the edge of the plaza to tightly crop your subject and exclude the surrounding crowds. No, Cloud Gate is located in the public area of Millennium Park and is free to access. However, professional commercial shoots with large crews and equipment may require a permit from the city of Chicago.What is the best time of day to photograph The Bean?
Do I need a professional camera for good photos of Cloud Gate?
Where is the best spot to see the skyline in the reflection?
How do I get rid of the crowds in my photos?
Is there a fee to take photos at Cloud Gate?